Friday, January 11, 2013

Gluten Free Cheez Its Recipe


Gluten Free Home Made Cheez Its

If you think these look good, wait until you see how easy they are to make!

The ingredients are things you might already have in your pantry and fridge - cheese, rice flour, butter, salt.  The onion powder and chipotle pepper are optional.
You'll need your food processor for this recipe.  Measure 1/2 cup sharp cheddar (or any other cheese you like - pepper jack would be great) into the food processor. 
 Add 1/4 cup of rice flour.
Add 4 teaspoons of butter - 1 1/3 tablespoons.
 Add 1/8 teaspoon of salt.
 Optional, 1/8 teaspoon of onion powder.
 Optional add a pinch of chipotle or cayenne pepper or freshly cracked black pepper.

Process until it starts holding together in clumps - about 2 minutes or so.

Press it all into a ball
 
Place the ball of dough on a piece of waxed paper.
Cover with another piece of waxed paper. 
Get out your rolling pin and roll the dough as thin as you can. 
 Lift off the top layer of waxed paper
and use a pizza cutter to cut the dough into squares or triangles or whatever shape you like. 
 Using a spatula, move the squares to a baking pan lined with foil.
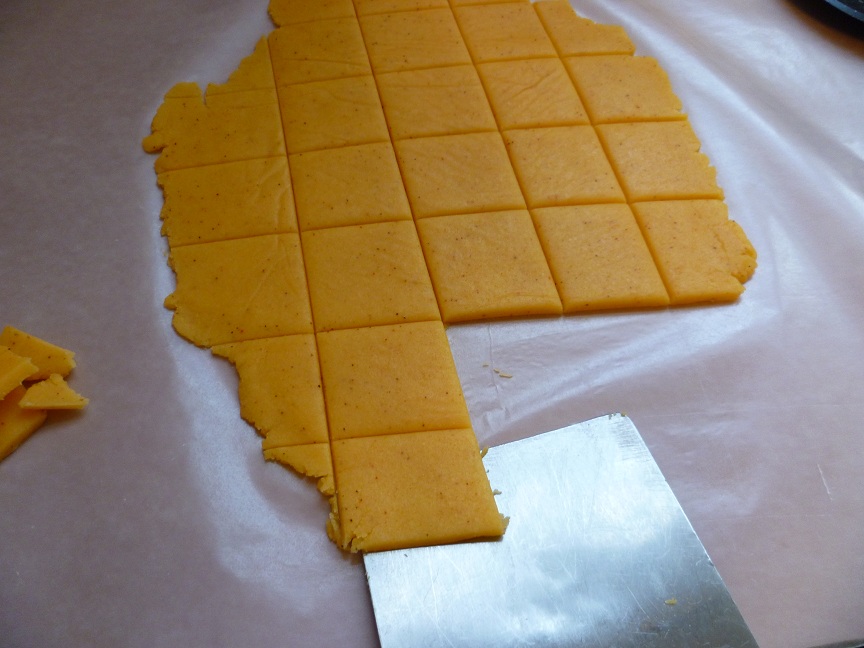
Don't they look pretty?
 
Gather up the scraps of dough
 into a ball
 and repeat the process of rolling and cutting.

Using a fork, perforate the dough.

Sprinkle with a little salt. 
Bake at 350 degrees for about 8 - 12 minutes, or until brown and crispy. 
Enjoy!   Wish you were here to enjoy this batch with me on the back porch.

Now it's your turn to try them.  They are delicious!
 Thanks for visiting the Americus Garden Inn blog.  Hope to see you soon.

GLUTEN FREE CHEEZ ITS RECIPE

1/2 cup shredded sharp cheddar cheese
1/4 cup rice flour
4 teaspoons butter
1/8 teaspoon salt
1/8 teaspoon onion powder (optional)
pinch chipotle or cayenne pepper (optional)

Preheat oven to 350 degrees.
Place all ingredients in food processor and process until dough begins to hold together - about 2 minutes.
Make a ball with the dough and place between 2 sheets of waxed paper.  Roll as thin as possible.
Cut dough into cracker sized pieces (they do not spread) and place on foil lined baking sheet.
Pierce with a fork, sprinkle with salt and bake for 8 - 12 minutes or until golden brown and crispy.
Yield:  25 - 30 crackers


Friday, December 21, 2012

Coconut Macadamia French Toast - vegan and gluten free


Vegan Coconut Macadamia French Toast - gluten free


For some unknown reason, blogger will not allow me to post the rest of the photos for this recipe.  I know you want to see how to make this delicious vegan recipe made with gluten-free bread, so, please visit our facebook "notes" and you will find the recipe.  While you are visiting us on facebook, please "like" us!

Vegan Coconut Macadamia French Toast

Thanks for visiting our blog.  We hope to see you in Americus soon.

Love,
Susan

Monday, November 12, 2012

Baked Fuyu Persimmons

The fuyu persimmon tree is absolutely overloaded with beautiful ripe fruit.
What to do with all these persimmons...  Since they have the texture of an apple, I thought I would use some easy recipes that I use with apples.  And, I wanted them to be gluten free, so I could have one.

I decided to try a couple of different baking techniques to see which method produced the best results.  I wanted to bake the persimmons in the shell, so to speak, so, I started by cutting off the stem end.
 The first persimmon, I tried to scoop out the pulp with a grapefruit knife.  It did not work.  So, I used a melon baller to scoop out the fruit.
 The other persimmon, I just cored like I would for a baked apple.
 Here are the two options.
 I used the same ingredients for both - brown sugar
 and a sprinkle of cinnamon.
 I chopped up the fruit that I had scooped out
 added some brown sugar and cinnamon
 and placed it all back in the shell.

I added a little butter

 to both options
 and baked at 350 degrees until they were "done".
 The one with the chopped fruit was nicely browned on the top


 and the "cored" option had a lovely center of buttery goodness.

 I tested both with a fork for tenderness after 30 minutes and found they both needed more time in the oven.
After another 20 minutes, the top caramelized very nicely.
 The "cored" option was delicious, but, a little on the firm side for me.
 Due to the firmness, I used the grapefruit knife to carefully loosen the baked fruit and "section" the pieces for easier eating.  Kim said he liked the buttery center which coated each bite.
The chopped option was a little softer, but, I really liked the flavor of the caramelized top better than the fruit underneath.  So, I scooped it all out of the shell into the ramekin  and baked it another 15 minutes.
The persimmon took on this delicious nutty quality.  I put the fruit back into the shell to serve.

 It tasted really yummy, but, I felt it was missing something.
 You know how apple pie is elevated by a little whipped cream or ice cream?  Well, I decided to hand whip just a little cream.
 What a difference a little cream made!  DELICIOUS!
 Thanks for joining me on my baking journey in our kitchen at the Americus Garden Inn Bed & Breakfast.  If you come visit us soon, I'd be happy to bake one for you!  Or, you can pick a few to take home with you.